THE STRATEGOGAME FIELD GUIDE
Stratego Strategy — 12 Tips That Work
Stratego strategy starts with a distinction: an unknown piece is a question, not automatically a weak target. These twelve practical tips connect information, material and time to a decision you can make on your next turn. They apply to the classic forty-piece format, with additional notes for our local preview. The examples are original teaching positions; they are not a claim that any single move guarantees a win.
Before a trade, name what you will learn, what you can lose, and which route opens afterward. A small information gain is not worth every possible sacrifice.
- What should I ask before attacking an unknown piece?
Identify what the attack can reveal, what you can lose, and which friendly piece can follow up. A useful probe changes the next decision; sacrificing an officer for information with no reachable follow-up can leave a worse position.
Original guidanceFull explanation ↗- Can any soldier capture a Bomb once its identity is known?
Knowing the square does not change the battle rule. Only an attacking Miner removes a Bomb. Repeated attacks by other soldiers remove those attackers without weakening or moving the Bomb; find a Miner route or choose another lane.
1. Stratego strategy starts with a useful probe
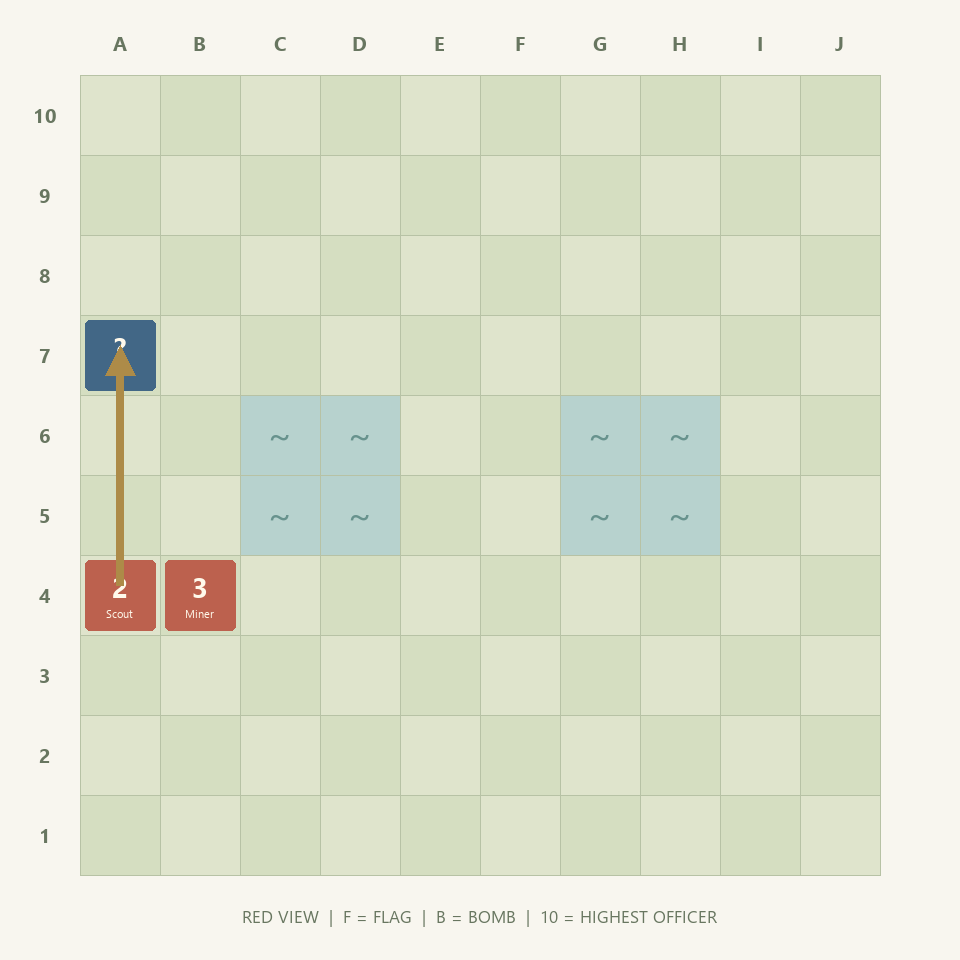
Send a Scout where the result can change your next decision. Testing a defender in an open A-file is useful if another soldier can follow; probing a sealed pocket behind lakes may reveal a rank you cannot reach for several turns. Before sacrificing the Scout, identify the friendly piece that will exploit either outcome. If there is no follow-up, consider a quiet move that improves your access instead.
2. Separate observed facts from guesses
A piece that moved is neither a Bomb nor a Flag. A piece that ran multiple squares is a Scout. Those are facts. A piece that stayed still for ten turns is only a candidate for an immobile type, not proof. When an opponent advances a different soldier into the same square, your remembered identity belongs to the original soldier, not its old address. This prevents expensive attacks based on a stale mental label.
3. Trade ranks in the context of the remaining army
Exchanging equal Colonels may be attractive when your General is still alive and theirs is gone. The same exchange can be unhelpful when your Colonel is the only mobile defender near the Flag. Compare the officers that remain after both pieces disappear, then ask who controls the relevant lane. Counting only the two pieces in the immediate battle ignores the position you will actually have to play next.
4. Reserve a Miner for the position you expect to reach
Five Miners look plentiful at setup, but losing all of them changes which Bomb-protected positions are reachable. Keep at least one with a route toward the side you are investigating. Reserving a Miner means preserving access as well as preserving the piece: a survivor trapped behind your own Bombs cannot help. Do not assume an early opponent sacrifice against a low rank makes your final Bomb-breaking soldier expendable.
5. Stratego Spy timing: create the attack, not just the threat
A Spy next to an enemy Marshal does not automatically win. If the Marshal moves first and attacks, your Spy disappears. Try to arrange the encounter so that you can attack on your turn, with a route that is not blocked by a different defender. Baiting can mean offering a target the Marshal wants, then using the resulting square or tempo; it is a tactical hypothesis, not a forced line against a hidden army.
6. Stratego ranks: know the strongest survivor
Printed rank numbers are not points awarded at the end. After the enemy Marshal is gone, a surviving General may control encounters it could not previously risk. Recalculate that hierarchy after every major exchange. Use names if your physical set numbers officers in the opposite direction. In our format Marshal 10 is strongest, but an attacking Spy still overrides that ordinary comparison; the exception never turns the Spy into a General-hunting piece.
7. Stratego Bomb deductions: spend information carefully
A failed Captain attack that exposes a Bomb can be useful if a Miner can now open the route to something valuable. It is a poor bargain if the Bomb seals an irrelevant corner and the Captain was your only defender elsewhere. Bombs remain after ordinary attacks. Repeating the same test with another non-Miner does not weaken one. Once identified, calculate a Miner route or redirect the attack instead of paying twice for the same information.
8. Use the lakes to count approach routes
The central water divides access into three passages. A single strong defender may cover a narrow approach, but it cannot teleport between passages. Before shifting an officer across the board, count the turns needed to reach the other lane and the attacks available while it travels. A second, modest defender already nearby can be more useful than your strongest officer committed several turns away.
9. Keep a retreat that does not depend on an illegal loop
Backing away from a known superior piece is sensible only if the retreat stays legal and leads somewhere. Repeatedly crossing the same two squares eventually hits the movement restriction. Look for a third square or another defender before that happens. Do not plan a perpetual chase as a substitute for improving the position. Our local threefold-position draw is a separate house rule, not a tactical right to retreat forever.
10. Defend a Flag that has already been found
Once the opponent knows your Flag’s square, moving unrelated hidden pieces will not restore its secrecy. Identify the nearest enemy Miner and the entry squares from which the Flag can be attacked. Bring a mobile defender to a square that intercepts the route, rather than leaving it directly behind an immobile guard. If several threats exist, calculate which can arrive first; a Bomb pocket alone does not answer a known Miner.
11. Ask what your opponent gains while you investigate
Every probing move uses a turn during which the opponent can improve another part of the board. Before launching a long Scout run, inspect whether your Flag’s route is threatened immediately. A useful experiment can still be too slow. Compare the next two actionable threats, rather than searching indefinitely for perfect knowledge of the entire army. Hidden information rewards selective questions because you rarely have time to answer all of them.
12. Change one opening assumption after a loss
Review one decision you can explain: a Miner spent without a follow-up, an officer stuck behind a Bomb, or a Spy left where the Marshal could attack first. Replay that idea with one formation change. Changing every piece at once makes it difficult to tell which decision mattered. Our current preview has a short public battle log, not a saved replay or paid analysis service; use it to reconstruct a specific encounter while it is fresh.
Sources and edition notes
The rule facts below were checked against these references. The examples, formations, diagrams, video and printable explanation on this site were written for this guide.
- Jumbo: Original / 65th Anniversary rules ↗Classic forty-piece army, movement, battles and the optional Battle Cards edition. Our examples are independently written.
- Strategus: both rank-number systems ↗A useful name-by-name comparison of the older and newer numbering directions.
A complete match teaches more than memorizing every hidden possibility.
Go to the board →